The Update Manager PowerShell library adds a set of cmdlets to PowerCLI which allow you to interact with Update Manager. There are cmdlets that allow you to download patches, create baselines and scan and re-mediate hosts.
Installing Update Manager PowerCLI
The installation process is straight forward, however there are a few pre-requisites. These are:
- .NET 2.0 SP1
- Windows PowerShell 2.0 or later
- PowerCLI 4.1 or later
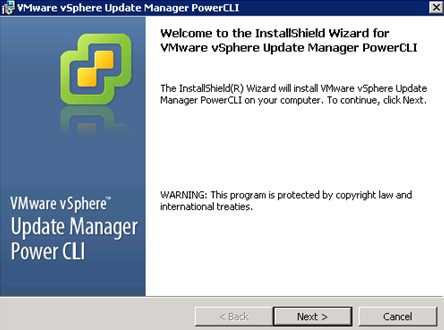
I’ve previously written a post about installing PowerCLI. First of all you will need to download the installation package from here. As usual, double click the downloaded executable to begin the installation:
Click Next at the Welcome screen:
On the next screen, accept the license agreement, then click Next. On the summary screen, click Install:
Once the installation is complete, you can run PowerCLI as normal, but you will now have the VUM automation modules available:
Using Update Manager PowerCLI
Once you have all the pre-requisites installed, opened PowerCLI, and have established a connection to vCenter, you can use the new cmdlets to interact with update manager.
For example, to list the baselines you have configured, run:
PowerCLI C:\> get-baseline | select name

Name
----
VA Upgrade to Latest (Predefined)
VMware Tools Upgrade to Match Host (Predefined)
VM Hardware Upgrade to Match Host (Predefined)
Critical Host Patches (Predefined)
Non-Critical Host Patches (Predefined)
TestBaseline
The output above shows the predefined patch baselines, which are created when you install VUM, and one additional baseline called ‘testbaseline’. To list the patches that are part of a baseline, you can run:
PowerCLI C:\> get-baseline testbaseline | get-patch

Name                 Product         Release Date    Severity   Vendor Id
----                 -------         ------------    --------   ---------
Updates esx-base     {embeddedEsx... 24/10/2012 0... Important  ESXi510-2012...
Updates esx-base     {embeddedEsx... 20/12/2012 0... Moderate   ESXi510-2012...
Updates tools-light  {embeddedEsx... 20/12/2012 0... Moderate   ESXi510-2012...
Updates esx-base     {embeddedEsx... 20/12/2012 0... Important  ESXi510-2012...
Updates tools-light  {embeddedEsx... 20/12/2012 0... Important  ESXi510-2012...
Updates esx-base     {embeddedEsx... 07/03/2013 0... Important  ESXi510-2013...
Updates ESXi 5.1 ... {embeddedEsx... 25/04/2013 0... Important  ESXi510-2013...
Updates ESXi 5.1 ... {embeddedEsx... 25/04/2013 0... Important  ESXi510-2013...
You can create a new baseline with the following:
PowerCLI C:\> $patch = get-patch -Product "embedd*" -After "1 Jan 2014"
This will populate the $patch variable with all patches for ’embedded’ESX, otherwise known as ESXi. We can then use the $patch variable as the list of patches to be included in a new baseline:
PowerCLI C:\> New-PatchBaseline -Static -Name "NewBaseline" -IncludePatch $patch

WARNING: column "NumberOfPatches" does not fit into the display and was removed
.

Name                 Description          Id    Type  Targe LastUpdateTime
                                                      tType
----                 -----------          --    ----  ----- --------------
NewBaseline                               7     Patch Host  28/03/2014 14:43:39
We can now attach that new baseline to a host:
PowerCLI C:\> $newbaseline = Get-Baseline *newbaseline*
PowerCLI C:\> Attach-Baseline -Baseline $newbaseline -Entity esxi4.vmlab.loc
To scan the host after attaching the baseline, run:
PowerCLI C:\> Scan-Inventory -Entity esxi4.vmlab.loc
After scanning, you can check the compliance of the host:
PowerCLI C:\> get-compliance -Entity esxi4.vmlab.loc

Entity                         Baseline                            Status
------                         --------                            ------
esxi4.vmlab.loc                NewBaseline                         NotCompliant
We can see that the host isn’t compliant, so will require remediation. To list the patches that the host is missing run:
PowerCLI C:\> $compliance = get-compliance -Entity esxi4.vmlab.loc -detailed
PowerCLI C:\> $compliance.NotCompliantPatches

Name                 Product         Release Date    Severity   Vendor Id
----                 -------         ------------    --------   ---------
Updates ESXi 5.1 ... {embeddedEsx... 16/01/2014 0... Critical   ESXi510-2014...
Updates ESXi 5.1 ... {embeddedEsx... 16/01/2014 0... Important  ESXi510-2014...
Updates ESXi 5.1 ... {embeddedEsx... 16/01/2014 0... Moderate   ESXi510-2014...
Updates ESXi 5.1 ... {embeddedEsx... 16/01/2014 0... Critical   ESXi510-2014...
Updates ESXi 5.1 ... {embeddedEsx... 16/01/2014 0... Critical   ESXi510-2014...
Updates ESXi 5.1 ... {embeddedEsx... 16/01/2014 0... Important  ESXi510-2014...
To remediate the host, first create a variable which will include the baselines attached to the host:
PowerCLI C:\> $base = get-baseline -entity esxi4.vmlab.loc
Then start the remediation with:
PowerCLI C:\> Remediate-Inventory -Entity esxi4.vmlab.loc -Baseline $base -HostF
ailureAction Retry -HostNumberOfRetries 2 -HostDisableMediaDevices $true

Perform the operation?
Performing operation 'Remediate Inventory' on Inventory Items:
'esxi4.vmlab.loc' for Baselines: 'NewBaseline' and ExcludedPatches: ''
[Y] Yes  [A] Yes to All  [N] No  [L] No to All  [S] Suspend  [?] Help
(default is "Y"):y
The host update process will begin, with PowerCLI displaying a progress bar by default. Switching back to the vSphere client, we can see the update tasks being run:
Useful Links and Resources
https://pubs.vmware.com/vsphere-55/index.jsp#com.vmware.powercli.vum_inst.doc/vumps_admg_chapter.3.3.html?path=2_2_2_0_1_1#975949


