This article takes a look at how you can use Terraform to deploy WVD (Windows Virtual Desktop). I use Terraform often to deploy virtual machines and infrastructure, and try and keep aware of any new functionality or Terraform providers that are released.
Following the Spring 2020 release of WVD, the ability to provision WVD resources using Terraform has been added. There are currently four types of WVD resource now available in the Terraform Azure Provider. These are:
azurerm_virtual_desktop_workspace– Manages a Virtual Desktop Workspace.virtual_desktop_application_group– Manages a Virtual Desktop Application Group.virtual_desktop_host_pool– Manages a Virtual Desktop Host Pool.azurerm_virtual_desktop_workspace_application_group_association– Manages a Virtual Desktop Workspace Application Group Association.
Detailed information for each can be found in the Terraform Azure Provider documentation. I’ve created Terraform plan to deploy these WVD resources, which I will now go through.
Windows Virtual Desktop – WVD Terraform Plan
This Windows Virtual Desktop Terraform plan makes use of all the resources mentioned above. It will create the following resources:
- Resource Group – in which all the subsequent resources will be placed
- WVD Workspace
- WVD Application Group – using the Desktop type, rather than remote app
- WVD Host Pool – Pooled, using Depth First as the Load Balancing method
- Association between the App Group and the Workspace.
At the current time, there isn’t a Terraform resource to cover provisioning the WVD session hosts, however there are a number of ways to do this, either using the Azure Portal or via ARM templates and so on. Look out for an article covering this.
Now, on with writing the WVD Terraform plan. First of all we need a variables.tf file to contain all our variables. These will be used to populate some of the values in the WVD terraform plan, such as the Workspace name, Resource Group and Location. My variables.tf looks like this:
variable "location" {
  description = "Location to Create all resources"
  default = "eastus"
}

variable "rg-name" {
  description = "The name of the resource group to be created"
  default = "wvd-rg"
}

variable "wkspace-name" {
  description = "The name of the WVD workspace to be created"
  default = "wvd-wkspace"
}

variable "hppooled-name" {
  description = "The name of the WVD pooled hostpool to be created"
  default = "wvd-pool-hp"
}

variable "appgrp-name" {
  description = "The name of the WVD app group to be created"
  default = "wvd-desktop-ag"
}

resource "azurerm_resource_group" "wvdrg" {
  name     = var.rg-name
  location = var.location
}
If you intend to try this out, ensure you update the default values to something appropriate to your environment! Along with the variables.tf, I created a wvd.tf file which is where the bulk of the work is done. My wvd.tf looks like this:
provider "azurerm" {
  features {}
}

resource "azurerm_virtual_desktop_workspace" "workspace" {
  name                = var.wkspace-name
  location            = azurerm_resource_group.wvdrg.location
  resource_group_name = azurerm_resource_group.wvdrg.name

  friendly_name = var.wkspace-name
  description   = "Test Workspace Deployed using Terraform"
}

resource "azurerm_virtual_desktop_host_pool" "wvdhppooled" {
  name                = var.hppooled-name
  location            = azurerm_resource_group.wvdrg.location
  resource_group_name = azurerm_resource_group.wvdrg.name

  type               = "Pooled"
  load_balancer_type = "DepthFirst"
}

resource "azurerm_virtual_desktop_application_group" "desktopapp" {
  name                = var.appgrp-name
  location            = azurerm_resource_group.wvdrg.location
  resource_group_name = azurerm_resource_group.wvdrg.name

  type          = "Desktop"
  host_pool_id  = azurerm_virtual_desktop_host_pool.wvdhppooled.id
  friendly_name = var.appgrp-name
  description   = "Test App Group"
}

resource "azurerm_virtual_desktop_workspace_application_group_association" "workspacedesktopapp" {
  workspace_id         = azurerm_virtual_desktop_workspace.workspace.id
  application_group_id = azurerm_virtual_desktop_application_group.desktopapp.id
}
It’s a fairly short Terraform plan, but as you can see, there are resources to create a Azure resource group, and the WVD resources I mentioned earlier, pulling in the variable values to populate the resource names.
Running the WVD Terraform Plan
If you have experience in running Terraform Plans to create Azure resources then you likely already have an environment set up to allow for this. However, one of the ways I often use is to run the Terraform plan from an Azure Cloud Shell. Cloud Shell comes with Terraform available, though there may be some configuration steps to carry out. You can read all about this here.
Ultimately, you will need to have Terraform available, and the variable.tf and wvd.tf available in a directory. At this point we’re ready to run the WVD terraform plan. First of all we need to initialize Terraform using terraform init:
$ terraform init

Initializing the backend...

Initializing provider plugins...
- Finding latest version of hashicorp/azurerm...
- Installing hashicorp/azurerm v2.41.0...
- Installed hashicorp/azurerm v2.41.0 (signed by HashiCorp)
This will download the files Terraform needs for the Azure provider. Once complete we are ready to test the plan, using terraform plan:
$ terraform planThis will show all the Azure WVD resources that Terraform will create for us if we run the plan for real. Always review the output from this before proceeding, but in summary it should show that we will be created 5 new resources as part of this plan:
Plan: 5 to add, 0 to change, 0 to destroy.Now we can run the plan for real using terraform apply:
$ terraform applyYou will be prompted to confirm that you want Terraform to go ahead and build the resources. Enter ‘Yes’ when prompted to do so. The plan doesn’t take long to run – once it’s finished you should see:
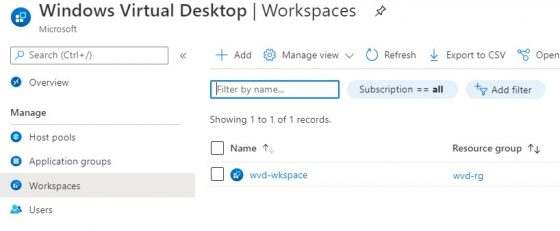
Apply complete! Resources: 5 added, 0 changed, 0 destroyed.And that’s it! Terraform has built out the WVD resources defined in the Terraform plan. Let’s check the Azure Portal to see what we have deployed. First of all we have the Windows Virtual Desktop Workspace:

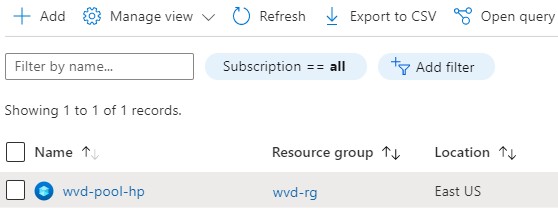
There is the host pool:

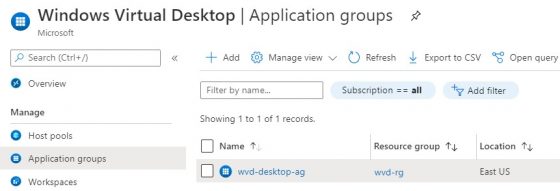
Finally, there is the App Group, which has been associated with the workspace and the host pool:

At this point we’re ready to build some WVD session hosts, and assign some users to the app group.
Final Thoughts
In this article you have learned how to deploy WVD using Terraform. This has included deploying a new resource group and WVD resources including a new Workspace, Desktop App Group and a Host Pool.
Now, for a production environment there is a lot more to consider such as host pool settings, RDP configuration, session host images, profile management (FSLogix) and more. But, Terraform is a great way to build out the initial WVD resources quickly and reliably. An no doubt more functionality will be added over time.