In the course of covering the VCAP-DCA objectives, I have written about ESXi Active Directory integration. When you log on to an ESXi host using AD credentials, those credentials are sent to the ESXi host, when then goes and queries the domain. If you implement the vSphere Authentication Proxy you can avoid the need to transmit those AD credentials to the host. When a host is joined to a domain, you specify the details of the proxy service. All subsequent AD authentication will be handled by the proxy service.
Installing the vSphere Authentication Proxy Service
You can install the vSphere Authentication Proxy service on the same server as vCenter or it can be installed on a different server, so long as it has connectivity to vCenter. There are a number of pre-requisites to be met before it can be installed:
- Windows Installer 3.0 must be installed on the server where the proxy service will be installed
- .Net 3.5 must be installed on the server
- The software should be installed using a domain administrator account
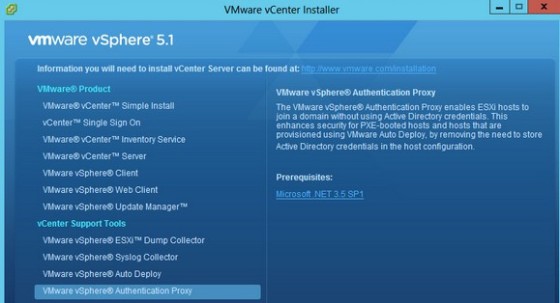
The installation can be started from the vCenter media:
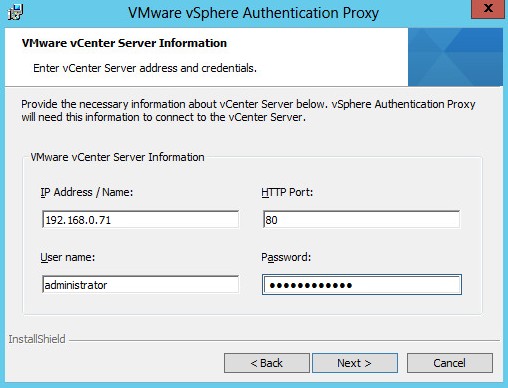
I won’t document all the installation screens here, as there are the usual splash screens and licence agreements. There is the vCenter connection screen though, which is where you enter the connection details for your vCenter server:
The connection will be tested when you click next, before letting you proceed to the next screen, which allows you to specify how the authentication proxy server should be identified on the network:
After clicking next, click ‘Install’ to begin the actual installation of the software.
Configure a Host to use the vSphere Authentication Proxy for Authentication
Once the vSphere Authentication Proxy service is installed, you must configure the ESXi host(s) to use the authentication proxy server to authenticate users.
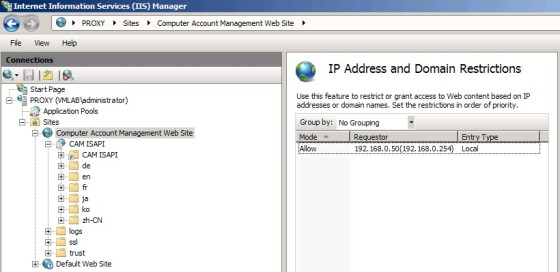
First of all, we need to set up the DHCP range in IIS Manager. This allows hosts that are using DHCP (Autodeployed hosts) to use the proxy service. To do so:
- Browse to Computer Account Management Website.
- Click the CAM ISAPI virtual directory in the left pane and open IPv4 Address and Domain Restrictions.
- Select Add Allow Entry > IPv4 Address Range:
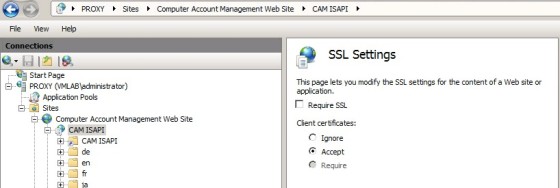
If a host is not provisioned by Auto Deploy, change the default SSL certificate to a self-signed certificate or to a certificate signed by a commercial certificate authority (CA).
The following SSL setting should also be set:
Before you use the vSphere Authentication Proxy to connect ESXi to a domain, you must authenticate the vSphere Authentication Proxy server with the ESXi host. If you use Host Profiles to connect a domain with the vSphere Authentication Proxy server, you do not need to authenticate the server. The host profile authenticates the proxy server to ESXi.
To authenticate ESXi to use the vSphere Authentication Proxy, export the server certificate from the vSphere Authentication Proxy system and import it to ESXi. You need only authenticate the server once.
To export the SSL cert if using IIS 7, to the following:
- On the authentication proxy server system, use the IIS Manager to export the certificate.
- Click Computer Account Management Web Site in the left pane.
- Select Bindings to open the Site Bindings dialog box.
- Select https binding.
Select ‘Edit’, then view the SSL certificate. Select the details tab, then click the ‘Copy to File’ button, then follow through the necessary steps to export the certificate. Ensure that you select the options ‘Do Not Export the Private Key’ and ‘Base-64 encoded X.509 (CER)’ when exporting the certificate. You should end up with a ‘.cer’ file with a name of your choosing.
To authenticate the vSphere Authentication Proxy server to ESXi, upload the proxy server certificate to the ESXi host.
You can use the vSphere Client user interface to upload the vSphere Authentication Proxy server certificate to ESXi. For this example, I’m going to put the certificate file on a local VMFS datastore on the host. It can be uploaded using the datastore browser.
Once we have the certificate placed on a datastore accessible to our host, we can configure authentication services to use it. Navigate to the hosts configuration tab then, under Authentication Services, click the ‘Import Certificate’ link. Enter the correct certificate details and the IP address of the proxy server in the dialog box:
Once the certificate has been imported, you can then join the host to the domain, following the steps described here, but ticking the box to use the Authentication Proxy.


