Following the recent release of vSphere 7, I thought it was time to take a look at how to do a vSphere 7 upgrade in my lab environment, taking it from vSphere 6.7 to 7.0. I’ve written about some of the new features in vSphere 7, and I’m keen to try them out!
vSphere 7 Upgrade – vCenter Appliance
Similarly to the vCenter 6.7 upgrade, the process for updating the vSphere 7 vCenter has two stages. The first stage deploys a new vCenter Server Appliance, then the second stage transfers the services, FQDN and configuration data to the new appliance. Once the process completes, the old VCSA will be powered off. Before we get started on the upgrade itself though, there are some pre-requisite activities. We need to download the install media, and we need to do some checks to help ensure the vSphere 7 upgrade will go smoothly.
vCenter 7.0 Download
The vCenter and ESXi installation media can be downloaded from https://my.vmware.com/en/web/vmware/info/slug/datacenter_cloud_infrastructure/vmware_vsphere/7_0 . This page has links for the ESXi and vCenter Server Appliance ISOs. I downloaded VMware-VCSA-all-7.0.0-15952498.iso, which is a 6.42 GB file.
Pre-vSphere 7 Upgrade Checks
Before diving straight in to doing the upgrade there are a number of pre-requisite checks you should carry out to ensure that the upgrade will go as smoothly as possible. To start with you should check the interoperabilty matrix to ensure that you stay in support with any other VMware solutions you have deployed, such as ESXi, SRM, vRealize Operations Manager, NSX etc. You can find VMware’s interoperability matrix here. You also need to check the upgrade path to ensure that you can upgrade from the version of vCenter you are running to vCenter 7. I will be upgrading from vCenter 6.7. You can check supported upgrade paths here.
Once satisfied that your VMware solutions are supported (or you have a plan in place to bring them to a supported level) then you should do similar checks for 3rd party software. Typical examples include backup software, monitoring software – basically anything that interacts with vCenter or the API.
Always check the official documentation! Review the release notes for the version of vCenter you are deploying. The release notes for the GA release I downloaded can be found here. Also read VMware’s documentation, which can be found here.
Finally, check you have licenses ready for use with vSphere 7 to ensure you don’t run into any license issues once you have upgraded!
vSphere 7 Upgrade Process – Stage 1 – Deploying the vCenter Server
So, now to the the fun part! Start by mounting (or you could extract the contents) the vCenter 7 ISO. I did this on a Windows server virtual machine I have in my lab environment. I’ll be using the UI installer for this article, which you can run using \vcsa-ui-installer\win32\installer.exe on the mounted ISO. This should launch the graphical installer. As this is an upgrade, I then selected the upgrade option:

The next screen shows the two stages involved in the upgrade process. The first stage deploys a new vCenter 7.0 server to the target ESXi host. The 2nd stage copies the data from the source vCenter to the newly deployed vCenter. Ensure you have backed up your source vCenter before you go any further! Click Next once ready. The next screen will display the EULA, which you should read!, and will need to accept before you can click Next.
Now we reach the first page where we need to input information:
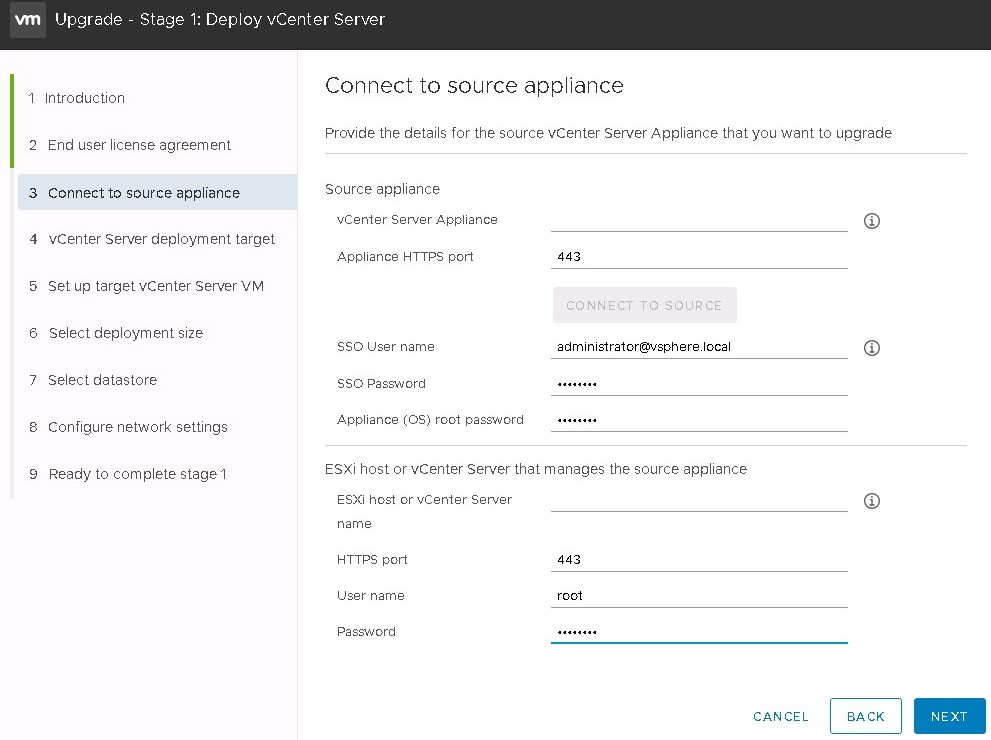
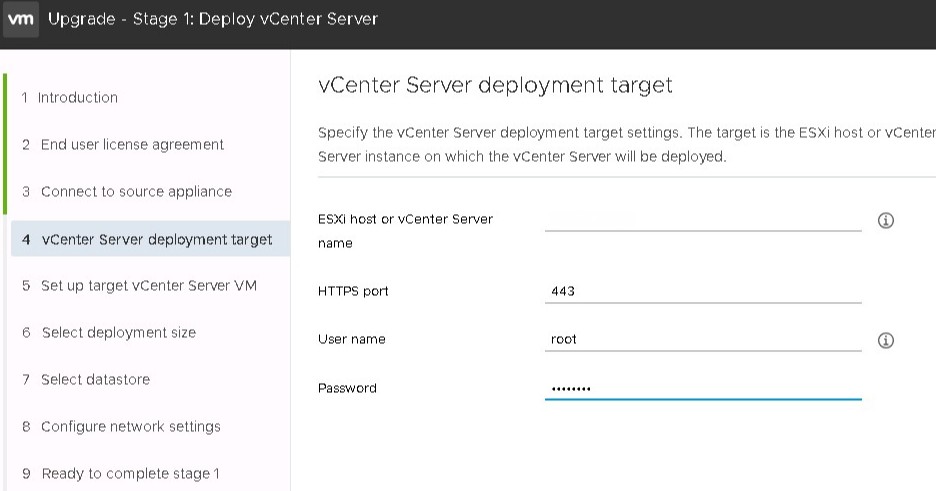
The details for the source vCenter appliance are required here, along with the details of the ESXi host or vCenter server that manages the source vCenter appliance. Use the FQDN of the source appliance and ESXi/vCenter servers here. Click next, you may get a certificate warning, depending on your environment. On the next page, enter the details of an ESXi host or vCenter server to deploy the new vCenter appliance to:
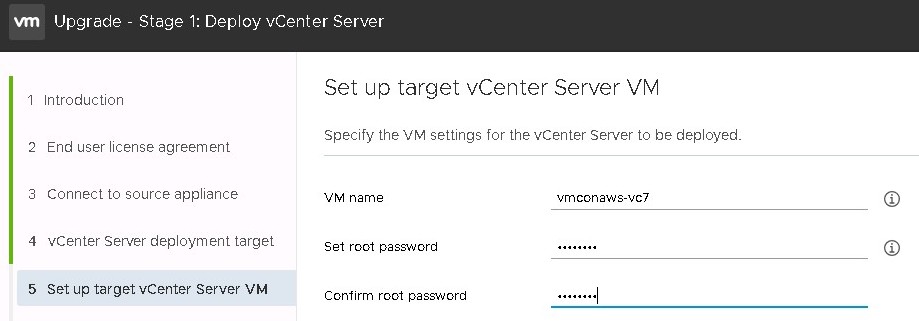
On the next screen, enter a name and root password for the new vCenter Appliance VM:
Click next. Now select the desired size for the new VCSA:
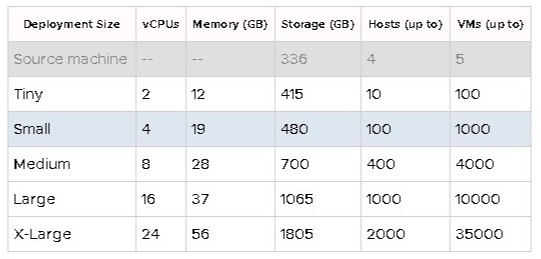
For my lab environment I select the ‘Small’ instance size. Once the size has been selected, click next. This will bring you to the datastore selection page, where you choose which VMFS datastore to deploy the new appliance to, and optionally choose whether to use thin provisioning for the new appliance. Click next once done.
Next, configure some temporary network settings for the new appliance. These settings will be used until the configuration of the existing source vCenter appliance is copied over, at which point they will change to that of the original source vCenter, and the source vCenter will be powered off.
After clicking next, a ‘Ready to Complete Stage 1’ page will be shown, which gives you an opportunity to review all of the configuration choices made. Click Finish, and the deployment will begin:

After some time, if all has gone smoothly, you should see a confirmation that the vCenter has deployed successfully:
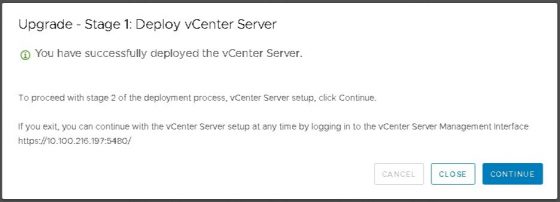
This ends stage 1 of the deployment and brings us to stage 2. Halfway there!! Click Continue!
Stage 2 – vCenter Configuration
Stage 2 is all about the migration of configuration data from the existing source vCenter appliance to the newly deployed vCenter 7.0 appliance.

Click next to begin the 2nd stage. Some upgrade checks will now be done. Review the recommendations before proceeding. When ready, click next – you will be asked to select what data you what to migrate to the new vCenter appliance:
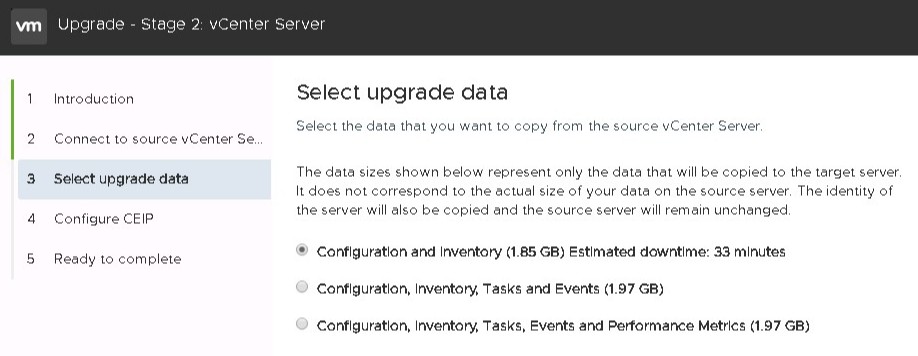
On the following page you can choose to opt in or out of the VMware Customer Experience Programme (CEIP), then on the final page a summary of the chosen settings is displayed. Click the Finish button to begin the configuration process. As with stage 1, a process bar will be displayed:

This will take a little while, but once complete you should see the following:
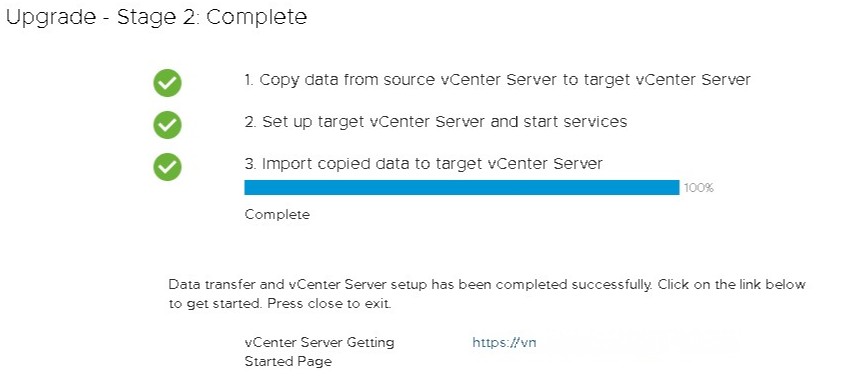
The upgrade process is now complete and you have an upgrade vCenter 7! At this point, the original vCenter will have been powered off. I’d suggest keeping it until you have confirmed there are no issues following the upgrade. You can always use it to roll back the upgrade should you need to.
So that’s it, a pain free upgrade to vCenter 7!